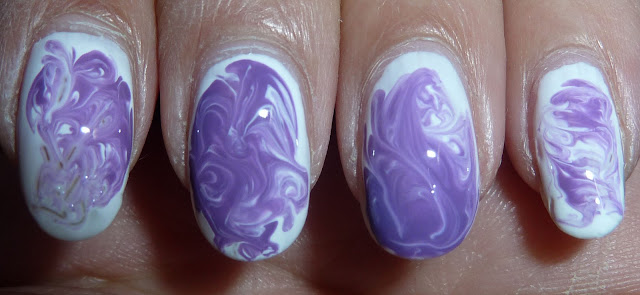
I always get positive comments on my nails evertime when I wear a nail like the one on the picture above. It's really easy, but no one actually knows how to make a nail like this, that's why I decided to make a tutorial on it.
Things you need;
- Three or more different colored nail polishes;
- Dottingtool;
- Nail polish remover(optional);
- Cotton pads(optional).
Step 1; Use a basecoat to prevent the nails from discoloration. Let it dry well before you go to the next step.
Before I talk about the other steps I want to say that you have to work very quick. Don't let the polish dry when you're doing this nail art. Otherwise you won't get the effect you want and then you have to start all over.
Step 2; Paint one nail in the desired color.
Step 3; Drop two(or more) little drops of two other colored polishes on the painted nail.
Step 4; Using a dottingtool to draw and zigzag the polish together till you have the pattern you want.
Step 5; This is how your nails kinda would look like. If you have some open spots you can just fill these in with a little drop of nail polish. This mostly happens when you used too little nail polish or when your nail polish was already drying.
Step 6; Let the nail dry! When it's completely dry you can use a topcoat. Not just to seal everything together but also to give the nails a little bit more shine.
The pictures above are two drag marbles I've had before. As you can see on the last picture, there are a few blanc spots with no polish on the left finger.
This way of nail art also has different ways to make different patterns and designs of drag marble. I only know a few. Maybe I'll do one for Valentine(which is soon). I don't know yet, but I'll definitly show you them sometime.
What do you think of this drag marble design? Hate it or like it?


Ik vind dit heel gaaf!
ReplyDeleteLiefs, xxx
Wow, supermooi gedaan zeg!
ReplyDeleteThank yyou for writing this
ReplyDelete