
I saw this look a couple of months ago on another blog. I really like this look and last week I thought about doing it on my own nails. It looks really nice, I think, and so here I made a tutorial on how to make your own graffiti nails!

What you need:
- Basecoat
- Different neon polishes
- A black crackle polish
- Topcoat
- Nail polish remover (optional)
- Qtips (optional)

Step 1; Start of with a basecoat. Then paint your whole nails with a neon color, the lightest one you chose of all neon polishes.

Step 2; Make random spots with the other neon polishes that are left. Let it dry.
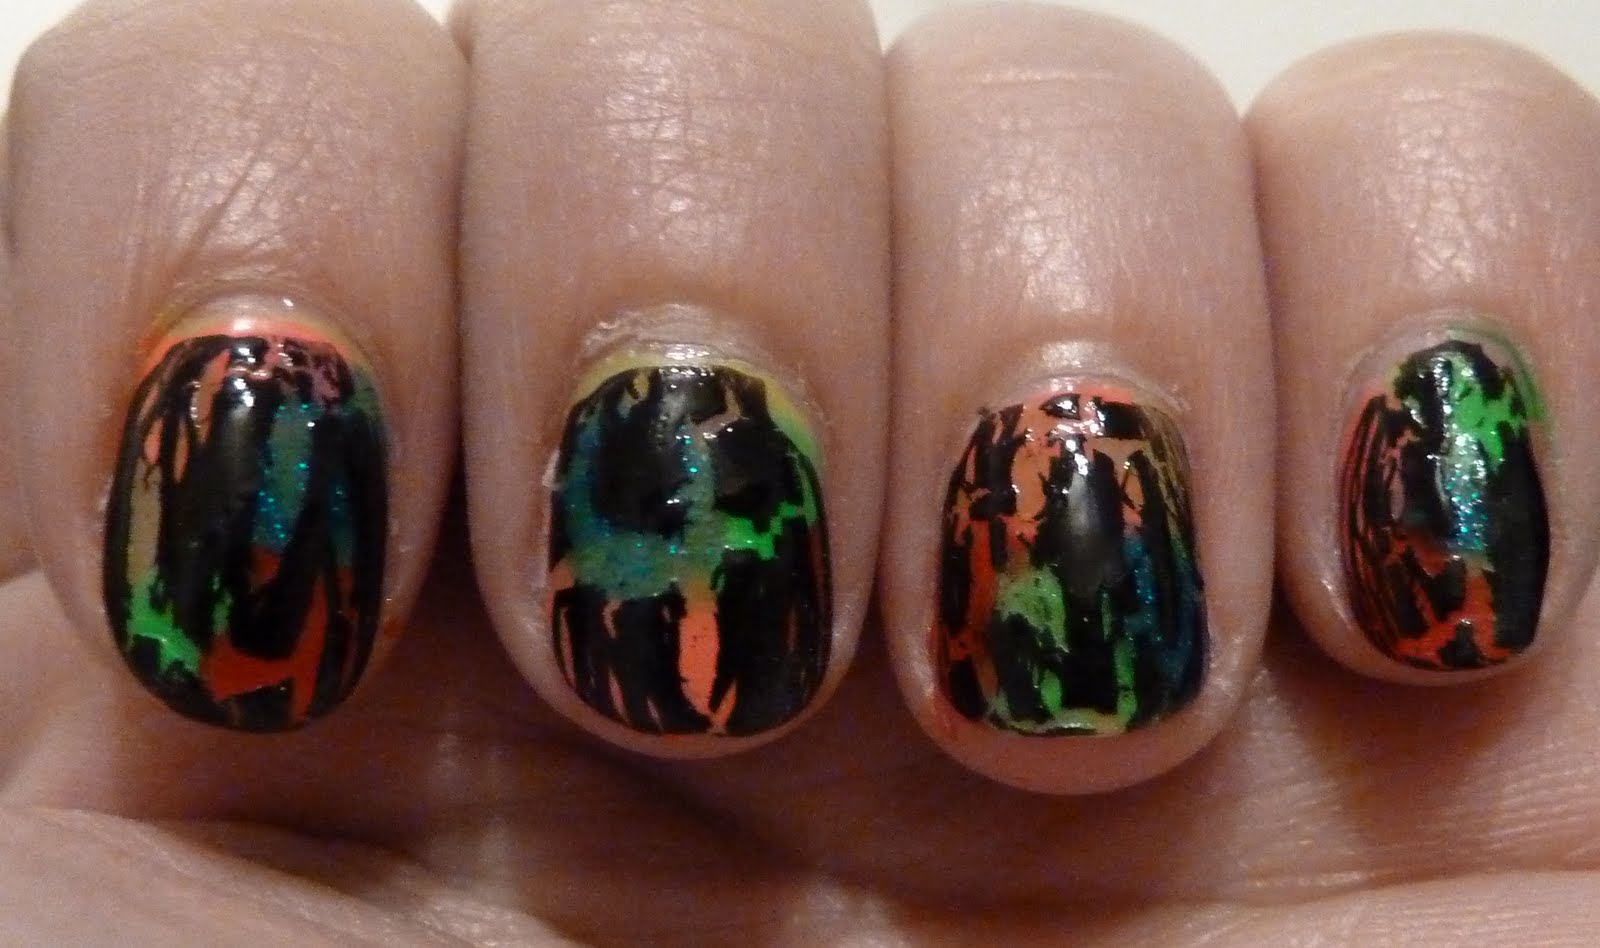
Step 3; Put a layer of black crackle polish on top. And last but not least your topcoat. This will seal everything together and your manicure will last longer.
Tadaa! Here is your very own graffiti nail art. Easy and fast to do, it looks fun and if you don't like these combination colors you can always use the colors you like.
i luv the idea maybe ill try it sometime!!!
ReplyDelete