

You might have seen this look or tutorial on other blogs. So have I. But I really liked the look so that is why I also made a tutorial of the look.
The look I'm talking about is a cherry blossom. You all know what a cherry blossom is right? Cherry blossom is the flower of a beautiful Japanese tree named Sakura. The fall of the flowers is, as Japanese people believe, connected with people lives... I'm not going into the story of the cherry blossom to deep because you can find it on Wikipedia, haha. Although, Wiki isn't such a reliable source.

Okay, enough about that let's go on to the tutorial!
What you need:
- Basecoat,
- A color nail polish of your choice
- Brown or black(striper) nail polish
- White(striper) nail polish
- A soft pink(striper) nail polish
- Dottingtool or a toothpicks. These are optional.
- Topcoat.

Step 1; Start of with a basecoat. You want the basecoat to protect your nails from discoloration.
Step 2; Paint your nails in a desired color. This is your "background" of the look. I used For Audrey from China Glaze.

Step 3; Draw some crooked brown or black stripes. If you don't have a striper this is the moment to use a toothpick or dottingtool. These crooked stripes will be the branch of the tree.

Step 4; Using your white nail polish and a dotting tool(or toothpick of course) to make 4 to 5 little dots in a circle, miscellaneous onto your nails. The little dots have to be on top of the brown stripes. The dots will make a flower.
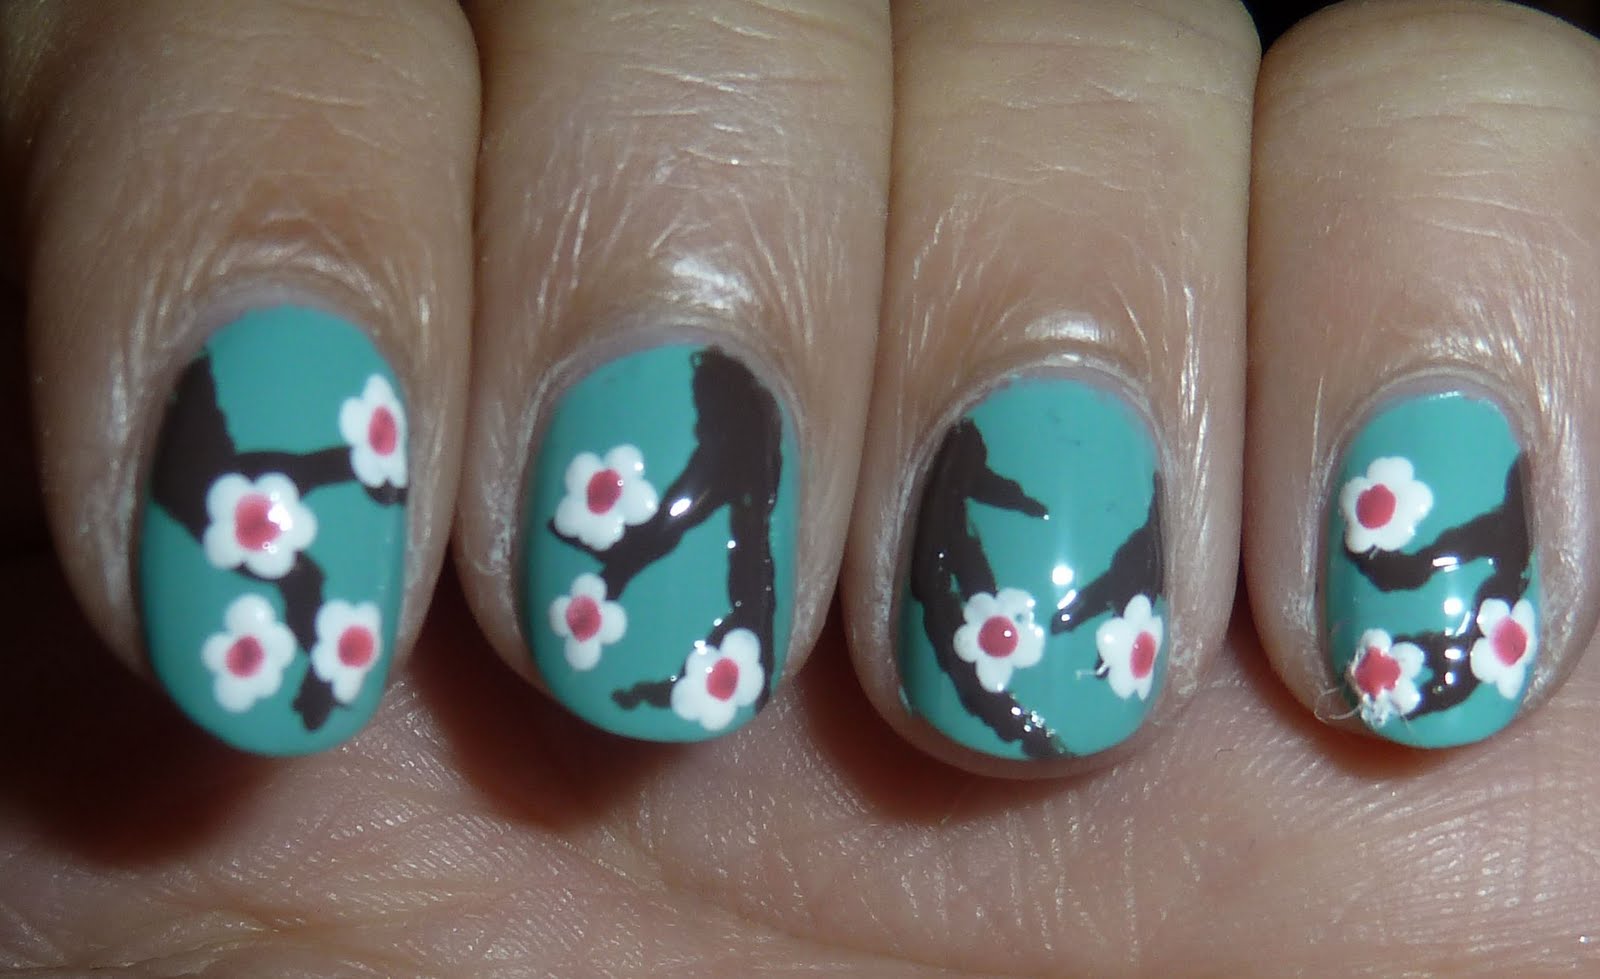
Step 5; Now using the pink polish. Make one dot in the middle of the flower you just made. This will be the pistil of the flower.
Step 6; You just finished all the step to make the cherry blossom nail art. All you need to do now is to put a top coat on top to seal your nail art and make it last longer.

That was my tutorial on the cherry blossom nails. I hope you liked it! It wasn't that difficult to make right? Well, if you have some questions leave them down below in the commentsection and I will read and awnser them as soon as possible!
Leuke tutorial! Ik ga het zeker eens proberen
ReplyDeleteMooi
ReplyDeletethat is sooo beautiful!!!
ReplyDeleteI haven't painted my nails since I was 15 but this has really inspired me to try it again, those nails are a work of art.
ReplyDelete